Welcome to the world of 3D scanning! If you’ve ever wondered how to transform a physical object into a digital model, you’re in the right place. Whether you’re a hobbyist trying to immortalize a beloved action figure or a professional needing precise measurements for a project, 3D scanning can be your ultimate tool.
The Magic of 3D Scanning
Let’s start by demystifying the magic of 3D scanning. Imagine you have a sculpture you adore. Wouldn’t it be cool to have a digital version that you can modify, print, or even animate? That’s exactly what 3D scanning does. It captures the geometry of an object and turns it into a digital 3D model. It’s like photocopying, but for geeks who love dimensions (and who doesn’t?).
Tools of the Trade
To embark on this adventure, you’ll need a 3D scanner. These devices come in various shapes and sizes, from handheld scanners to large industrial machines. The Artec Leo, for instance, is a fantastic option for those looking for portability and ease of use. But let’s not get ahead of ourselves; we’ll dive into equipment options a bit later.
Understanding Different Types of 3D Scanners
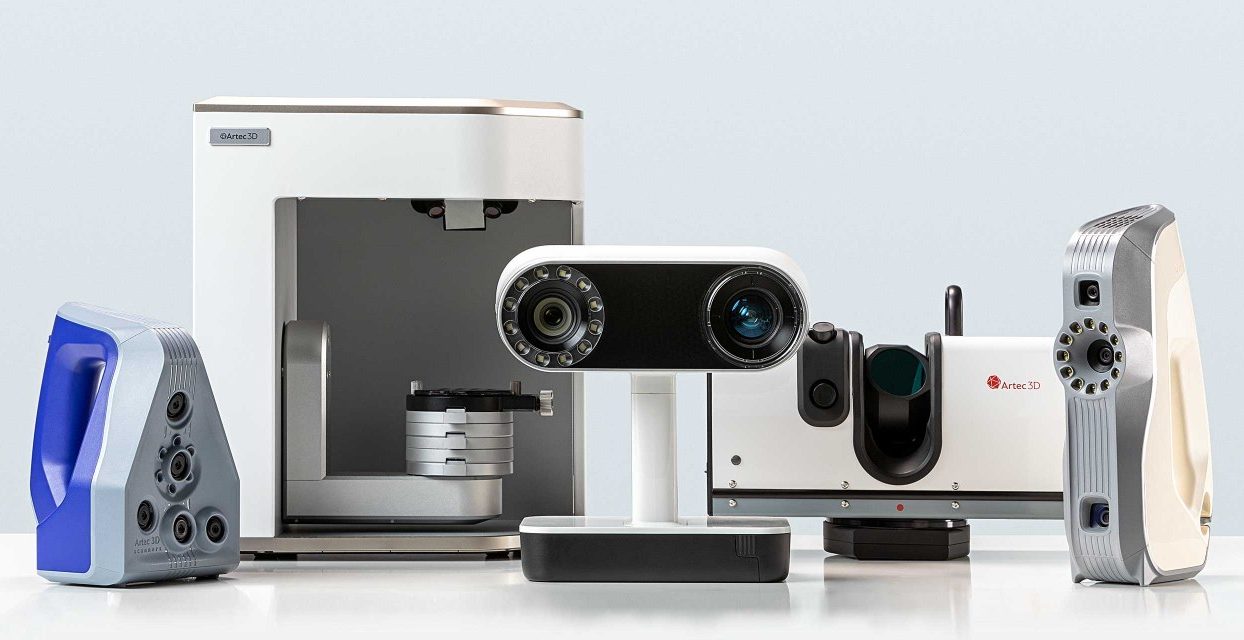
Before you whip out your credit card and order the first 3D scanner you see, it’s crucial to understand the different types available:
- Laser Scanners: These use lasers to measure the distance between the scanner and the object. They’re highly accurate but can be a bit pricey. Think of them as the Ferraris of 3D scanning.
- Structured Light Scanners: These project a series of light patterns onto an object and measure the deformation of these patterns. They’re fast and accurate, a bit like the cheetahs of the scanning world.
- Photogrammetry: This technique uses regular photos to create a 3D model. It’s like turning your DSLR into a 3D scanner, but it requires a lot of patience and processing power.
- Contact Scanners: These physically touch the object to map its surface. They’re incredibly precise but not ideal for delicate items. Imagine them as the gentle giants of scanning.
Preparing Your Object for Scanning
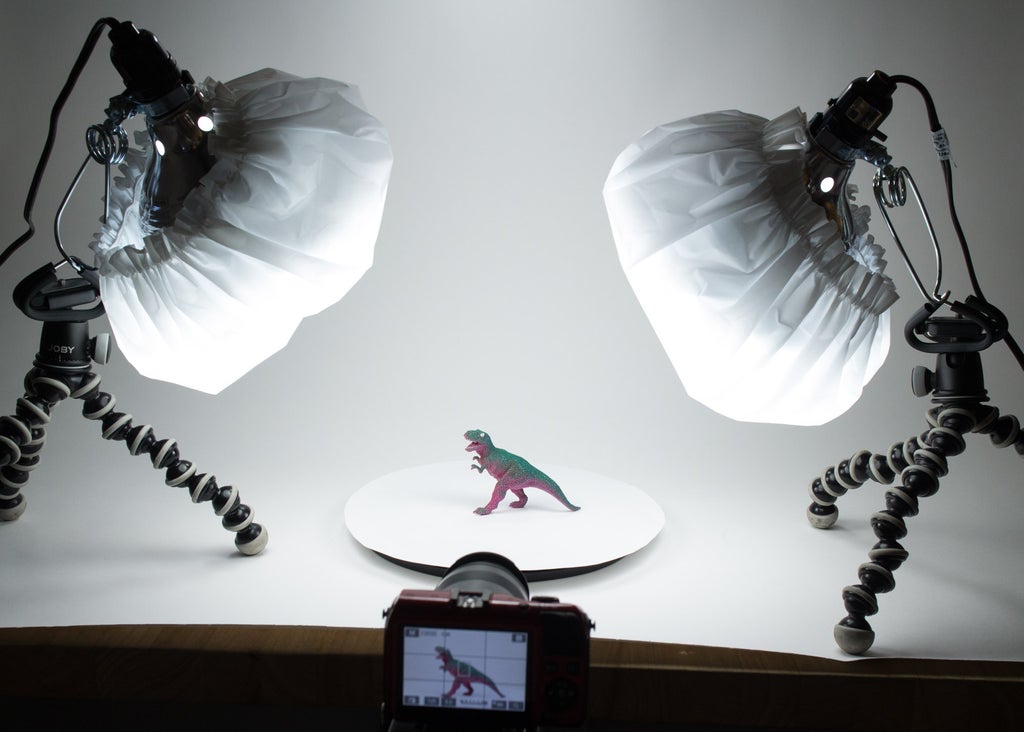
Now that you know the types of scanners, it’s time to prepare your object. This step is akin to getting ready for a photoshoot; you want your subject to look its best. Here are some tips:
Cleaning and Positioning
First, clean your object to remove dust and debris. A shiny, clean surface will yield better results. Next, position your object in a well-lit area. Good lighting is essential for capturing all the details. If you’re using a structured light scanner, make sure the patterns are easily visible.
Choosing the Right Background
The background should contrast with your object to ensure the scanner focuses on the subject rather than the surroundings. A cluttered background can confuse the scanning process, leading to errors in your model. So, keep it simple—like a minimalist Instagram photo.
The Scanning Process
Once your object is ready, it’s showtime! Follow these steps to perform a successful scan:
Calibrating Your Scanner
Before scanning, ensure your scanner is calibrated. This step is crucial for accuracy. Most scanners come with calibration software that guides you through the process. It’s like warming up before a big race; you don’t want to skip it!
Capturing Data
With the scanner calibrated, start capturing data. Move the scanner around the object to capture it from all angles. If you’re using a stationary scanner, rotate the object instead. This part of the process feels like a dance, as you gracefully maneuver around your object to ensure no detail is left uncaptured.
Data Processing
After capturing the data, it’s time for processing. Use your scanner’s software to stitch together the data points into a cohesive model. This step can be time-consuming, but it’s where the magic happens, turning raw data into a beautiful 3D model.
Editing and Refining Your 3D Model

Congratulations, you’ve got a 3D model! But wait, there’s more. Editing and refining the model is crucial for achieving perfection.
Using 3D Software
Use 3D software like Blender, Meshmixer, or ZBrush to clean up your model. This might involve smoothing surfaces, filling holes, or adding textures. Think of this as the digital equivalent of chiseling a marble statue.
Quality Check
After editing, perform a quality check. Inspect your model from all angles to ensure there are no errors or missing parts. This step is vital, especially if you’re planning to 3D print the model later.
Applications of 3D Scanning
So, what can you do with your newly scanned 3D model? The possibilities are endless!
3D Printing
One of the most popular applications is 3D printing. You can print a physical copy of your model, whether it’s a prototype or a replacement part for something broken. It’s like having a mini factory at your fingertips.
Virtual Reality and Augmented Reality
3D models can also be used in virtual and augmented reality. Imagine interacting with your scanned object in a virtual space or overlaying it onto the real world. It’s like bringing a piece of the future into the present.
Art and Entertainment
Artists and animators use 3D scanning to create digital art and characters. It adds a level of detail and realism that’s hard to achieve by hand. It’s the digital equivalent of having a magic wand.
Challenges and Troubleshooting

Like any technology, 3D scanning comes with its set of challenges.
Common Issues
Some common problems include distorted scans, missing data, or excessive noise in the model. These issues can often be resolved by adjusting your scanning technique or re-calibrating your equipment.
Learning Curve
There’s a learning curve involved, especially if you’re new to 3D scanning and modeling. But don’t let that deter you. With practice, you’ll become proficient, and the rewards are well worth the effort.
Key Takeaways
3D scanning is a fascinating blend of art and technology. It opens up new possibilities for creativity and innovation, from preserving historical artifacts to creating futuristic designs. So go ahead, dive into the world of 3D scanning, and see where your imagination takes you!