Picture this: you’re sitting at home, and you suddenly think, “I’d love to have a 3D printer.” But then you check your bank balance and realize, “Oops, maybe not.” What if I told you that you could build your very own 3D printer without breaking the bank? Welcome to the world of DIY 3D printers, where innovation meets hands-on fun.
Why Build a DIY 3D Printer?
There are countless reasons to dive into the DIY 3D printer world. For starters, building your own printer is often more affordable than purchasing a pre-assembled one. Plus, the experience of assembling it piece by piece is like a rite of passage into the maker community. You get to know every nut, bolt, and filament of your machine, making troubleshooting easier and enhancing your understanding of how things work.
Moreover, building a 3D printer is a fantastic learning opportunity. It’s like assembling a complex puzzle where you get to learn about mechanics, electronics, and software all rolled into one cool project. It’s also a great way to impress your friends — “Oh, you just bought yours? I built mine from scratch.”
Gathering Your Resources
Before embarking on your DIY 3D printer journey, it’s essential to gather the necessary resources. The internet is a treasure trove of information, with countless guides and forums dedicated to DIY 3D printing. Websites and communities like Thingiverse, Reddit’s 3D printing section, and various YouTube channels are invaluable resources.
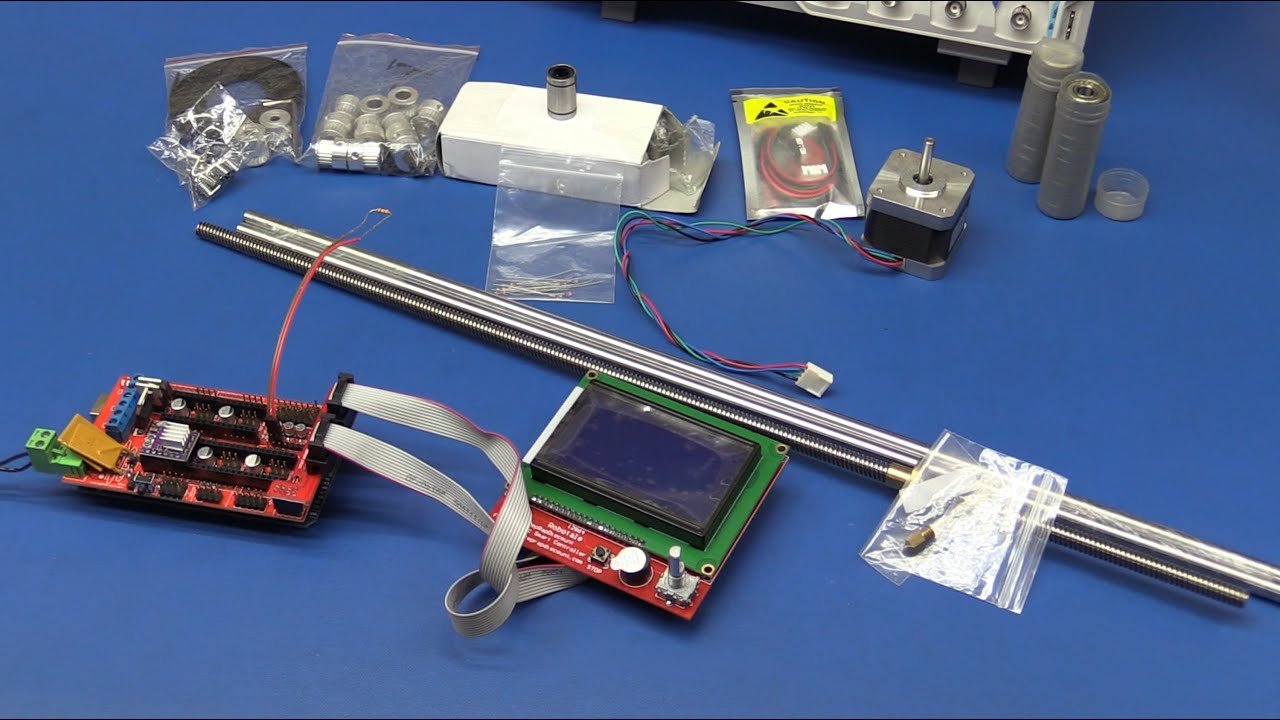
Make sure to compile a list of parts and tools you’ll need. This typically includes things like stepper motors, a control board, a power supply, belts, pulleys, and of course, the frame. Don’t forget to budget for the filament you’ll be using — it’s the ink for your 3D printer, after all.
The Building Process
Building a 3D printer can seem daunting at first, but with a bit of patience and perseverance, it’s entirely achievable. Most DIY kits come with instructions, but as with all projects, things might not go as planned — consider it a test of your problem-solving skills.
Step 1: Assembling the Frame
The frame is the skeleton of your 3D printer. Many DIY kits use aluminum extrusions due to their strength and lightweight properties. Carefully follow the instructions to assemble the frame, ensuring all parts are square and secure. A wonky frame is like a crooked picture frame — nobody wants that!
Step 2: Installing the Motors and Belts
Stepper motors are the muscles of your 3D printer, responsible for moving the print head. Attach these motors to the frame and connect them to the belts and pulleys. Precision is key here, as the alignment of these components will affect the quality and accuracy of your prints.
Step 3: Setting Up the Electronics
This step involves installing the control board, power supply, and wiring everything together. It’s like setting up a miniature electrical grid, so take your time and double-check all connections. If electronics intimidate you, remember that even the most complex circuit is just a series of simple connections. Plus, who doesn’t love the smell of solder in the morning?
Step 4: Calibrating the Printer
Calibration is a crucial step in ensuring your 3D printer produces high-quality prints. This involves leveling the print bed, adjusting the stepper motor settings, and fine-tuning the extruder. It might take a few tries to get everything just right, but the satisfaction of seeing that first perfect layer is worth it.
Choosing the Right Software
With your 3D printer assembled and calibrated, it’s time to choose the right software to bring your designs to life. There are several software options available, catering to different skill levels and printing needs.
Popular choices include Cura, PrusaSlicer, and Simplify3D. These programs allow you to slice 3D models into layers that your printer can understand. They also offer various settings to tweak for optimal print quality. Remember, the best software is the one you’re most comfortable using, so don’t be afraid to try a few options before settling on your favorite.
Exploring Design Software
In addition to slicing software, you’ll need design software to create or modify 3D models. TinkerCAD is a fantastic option for beginners, offering a user-friendly interface to create simple designs. For more advanced users, software like Fusion 360 or Blender provides a comprehensive suite of tools to design intricate models.
Filament Choices: What’s Your Flavor?

Choosing the right filament is like choosing the right pasta for your spaghetti — it makes all the difference. The most common filament types are PLA and ABS, each with its own unique properties.
- PLA (Polylactic Acid): Known for its ease of use and biodegradability, PLA is a favorite among beginners. It has a lower melting point and doesn’t require a heated bed, making it perfect for most home printers.
- ABS (Acrylonitrile Butadiene Styrene): ABS is more durable and heat-resistant than PLA, but it can be trickier to print with due to its tendency to warp. A heated print bed and a well-ventilated area are recommended when using ABS.
- Other Options: Once you’ve mastered the basics, consider experimenting with other filaments like PETG, nylon, or flexible TPU. Each offers unique properties and challenges, expanding your 3D printing horizons.
Common Challenges and Troubleshooting
Even the most seasoned DIYers encounter challenges with 3D printing. Don’t be discouraged by failed prints or unexpected hiccups — they’re part of the learning process. Here are some common issues and tips to overcome them:
Layer Shifting: If your prints appear misaligned, check the belt tension and ensure the stepper motors are functioning correctly. Sometimes, a simple belt adjustment is all it takes to get things back on track.
Warping: Warped prints are the bane of many 3D printing enthusiasts. Ensuring your print bed is level and using a heated bed can help reduce warping, especially with ABS filament. Additionally, consider using adhesion aids like glue sticks or painter’s tape for better bed adhesion.
Nozzle Clogs: Clogged nozzles can bring your printing to a screeching halt. Regularly clean the nozzle and ensure the filament is feeding correctly. If clogs persist, try increasing the print temperature or using a nozzle cleaning kit.
The Joy of 3D Printing

Building and using a DIY 3D printer is a rewarding experience that combines technical skills with creativity. Whether you’re printing functional objects, artistic sculptures, or just experimenting with designs, the possibilities are endless.
So, there you have it — a comprehensive guide to diving into the world of DIY 3D printing. It’s a journey filled with learning, challenges, and ultimately, satisfaction. Remember, every great maker started somewhere, and with your DIY 3D printer, you’re well on your way to joining the ranks of innovative creators. Happy printing!